If you’ve ever run a benchtop wood lathe, you know that one tiny misstep with your depth of cut can turn a promising project—say, a hand-carved bowl, a wooden spatula, or a small decorative spindle—into a pile of scrap lumber. As someone who’s spent over a decade selling and supporting benchtop wood lathes (and answering hundreds of panicked calls from new owners who just snipped a groove too deep or chattered a shoulder off their work), I can tell you this: controlling your depth of cut isn’t just a technical skill—it’s the difference between frustration and consistent, satisfying results. Benchtop lathes are compact, versatile, and perfect for small workshops, but their smaller size and less powerful motors mean they don’t have the same wiggle room as full-size floor models. Get this wrong, and you’ll burn through tools or damage your work before you finish the first round. Get it right, and you’ll turn out smooth, precise pieces you’ll be proud to display or use every day. Benchtop Wood Lathe
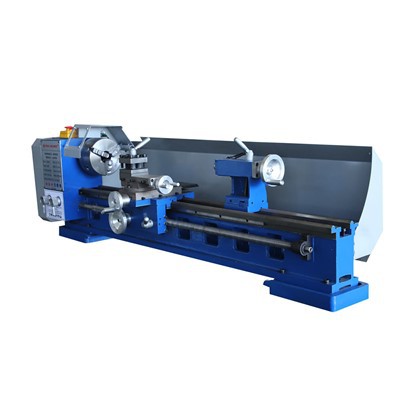
Let’s start with the basics, because so many new lathe owners skip this part. Depth of cut, simply put, is how much material the tool bit removes with each pass of the lathe. On a benchtop model, that distance is measured between the outside diameter of your workpiece and the final shape you’re carving. The biggest mistake I see is new operators assuming that more material removed per pass means faster work—but that’s rarely true. For hardwoods like oak or maple, even a small depth of cut can place too much strain on a benchtop motor, leading to stalling, uneven cuts, or tool deflection. For softer woods like pine or cedar, it’s easier to overshoot, leaving deep gouges that take extra time to sand smooth later.
The first, and most critical, tool for controlling depth of cut is the tool rest. So many people overlook how to set this correctly, and it’s the root of 70% of depth of cut errors. The tool rest needs to be positioned just above the centerline of your workpiece—no higher, no lower. If it’s too high, the tool bit will dig into the wood as it swings down, creating deep, uneven cuts. If it’s too low, you’ll struggle to make clean passes, and you’re more likely to gouge the wood accidentally. I always tell new customers to test this: spin the workpiece by hand (with the lathe turned off, obviously!) and make sure there’s at least a 1/8-inch gap between the top of the workpiece and the bottom edge of the tool rest. That gap is non-negotiable for consistent depth control. Once it’s set, tighten the rest’s clamp firmly—any wobble here will throw off your depth with every pass, even if you’re holding the tool steady.
Next, your tool selection matters more than you think for depth control. A sharp tool is non-negotiable, but the shape and type of tool bit will dictate how much you can remove per pass. Roughing gouges, which are used to shape the rough blank into a cylinder, can handle a slightly deeper cut—around 1/16 to 1/8 inch—on benchtop models, but only if they’re sharp and held at the correct angle. Skew chisels, which are used for fine smoothing and shaping, require much smaller cuts, usually 1/32 to 1/16 inch, because their narrow edge can’t handle the same force. Parting tools, which cut grooves or separate finished pieces from the blank, should only take 1/32 to 1/16 inch of material per pass; going deeper here will almost always cause the tool to bind, which can damage the workpiece or even send the tool flying. I’ve had so many customers call me after buying a cheap 10-piece tool set that came with dull skew chisels and wonder why their cuts are uneven—sharp tools aren’t a luxury, they’re the first line of defense for controlling depth.
Holding the tool correctly is where most new operators stumble, and it’s the easiest habit to build. When resting your tool on the tool rest, your hands should be positioned so that the tool bit is parallel to the workpiece’s surface, and your leading hand (the one closer to the workpiece) is fixed to the rest for stability. Never grip the tool so tight that your arm shakes—small, steady pressure is better than forcing the cut. For depth control, it helps to move your tool in small, gradual movements, not large swings. If you’re trying to shape a spindle, for example, instead of shoving the tool in 1/8 inch at once, take 4 or 5 tiny passes, each removing just 1/32 inch of material. This slow approach also reduces chatter, that annoying vibration that leaves ripples on your workpiece. Chatter is actually a sign that your depth of cut is too deep for the speed you’re running—so if you hear that high-pitched whine, back off immediately.
Lathe speed is another key factor that ties directly to depth of cut. Benchtop wood lathes typically have variable speed settings, which is one of the best features for small projects. For roughing cuts, run your lathe at a slower speed—around 1,000 to 1,500 RPM for hardwood, a bit higher for softwood. Slower speeds give you more control over the tool and reduce the risk of the wood catching or the motor stalling. For finishing cuts, you can bump the speed up to 1,800 to 2,500 RPM, which makes the cut smoother, but keep your depth of cut tiny here—no more than 1/32 inch. I always tell customers to test speed and depth of cut on a scrap piece of the same wood as their project first. This is called a “test cut,” and it’s worth 5 minutes of your time to avoid ruining a $20 piece of lumber.
One trick I’ve shared with hundreds of our customers is using a simple depth gauge to avoid guesswork. You don’t need anything fancy—even a small ruler or a piece of hard plastic marked with tiny measurements works. When setting up a cut, hold the gauge against the uncut surface of your workpiece, then adjust the tool rest or the tool position so that the distance between the tool bit and the edge of the gauge is equal to the depth of cut you want. For example, if you want to remove 1/16 inch of material, set the tool bit 1/16 inch away from the edge of the gauge, which you’ve pressed to the uncut part of the wood. This is especially helpful for repetitive cuts, like if you’re turning a set of matching bowls or spindles, where consistency is key. No more guessing how deep that cut was—you’ve got a hard number to follow.
Avoiding common pitfalls is half the battle. The biggest pitfall I see is over-cutting. It’s tempting to remove as much material as possible to get to your final shape quickly, but on a benchtop lathe, this will almost always lead to problems. Another mistake is not accounting for wood grain. Tearing grain, where chunks of wood pull out instead of being cut cleanly, happens when your depth of cut is too deep for the grain direction. Always turn with the grain when making cuts, and reduce your depth of cut by half if you’re working against the grain. Wet wood is also a factor—freshly cut green wood is softer and can handle a slightly deeper cut, but dried, seasoned wood is much denser, so you’ll need to scale back your depth to avoid burning the tool or stalling the motor.
If you do end up with too deep a cut, don’t panic. Small gouges can usually be sanded out with a medium-grit sandpaper, then followed by finer grits to smooth the surface. For deeper grooves, you can fill them with wood filler matching the wood color, sand it smooth, and refinish the piece later. But prevention is always easier—so take that extra minute to set up your tool rest correctly, test your cuts on scrap, and start with smaller depths.
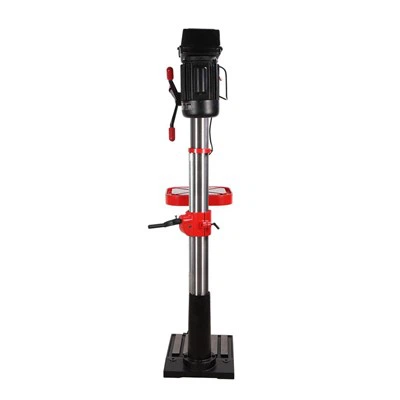
Now, if you’re looking to upgrade your benchtop lathe for better depth control, there are a few features to keep in mind. Look for models with smooth, secure tool rest clamps—wobbly rests will throw off even the steadiest hands. Variable speed control is non-negotiable, as we discussed, because it lets you adjust for different woods and cuts. A durable, cast-iron base will reduce vibration, which is a huge help when making precise cuts. Many of our benchtop lathes come with included tool rests, sharpening stones, and a guide for setting depth of cut, so new owners don’t have to guess when they start out.
Milling and Drilling Controlling depth of cut on a benchtop wood lathe isn’t something you master in one day—it takes practice, patience, and a little bit of know-how. But once you get the hang of it, it will completely change how you approach your projects. No more scrap wood, no more dull tools, no more frustration—just smooth, precise cuts and pieces you’ll love working on. If you’re ready to pick out a benchtop lathe that will make depth control easy, or if you have questions about which model is right for your projects, we’re here to help. Reach out to our team to discuss your needs, browse our range of benchtop wood lathes and accessories, and get the support you need to turn your woodworking ideas into reality.
References
- Salomone, R. The Complete Woodturner’s Manual: A Practical Guide to Tools, Techniques, and Projects. Taunton Press, 2019.
- Hunter, J. Benchtop Woodturning: A Beginner’s Guide to Small Workshop Projects. Fox Chapel Publishing, 2021.
- National Wood Lathe Safety Board. Safe Operation of Benchtop Wood Lathes. American Wood Council, 2020.
- Jones, M. Tool Rest Setup and Depth of Cut Control for Small Wood Lathes. Woodworking Journal, Vol. 47, No. 2, 2018, pp. 34–38.
YS Machine Tools Co., Ltd.
We’re well-known as one of the leading benchtop wood lathe suppliers in China, featured by quality products and good service. Please rest assured to buy customized benchtop wood lathe at competitive price from our factory. Contact us for more details.
Address: 300 Sandusky st, Ohio, 43611, USA
E-mail: yishoumachinetools@gmail.com
WebSite: https://www.ysmachinetool.com/
